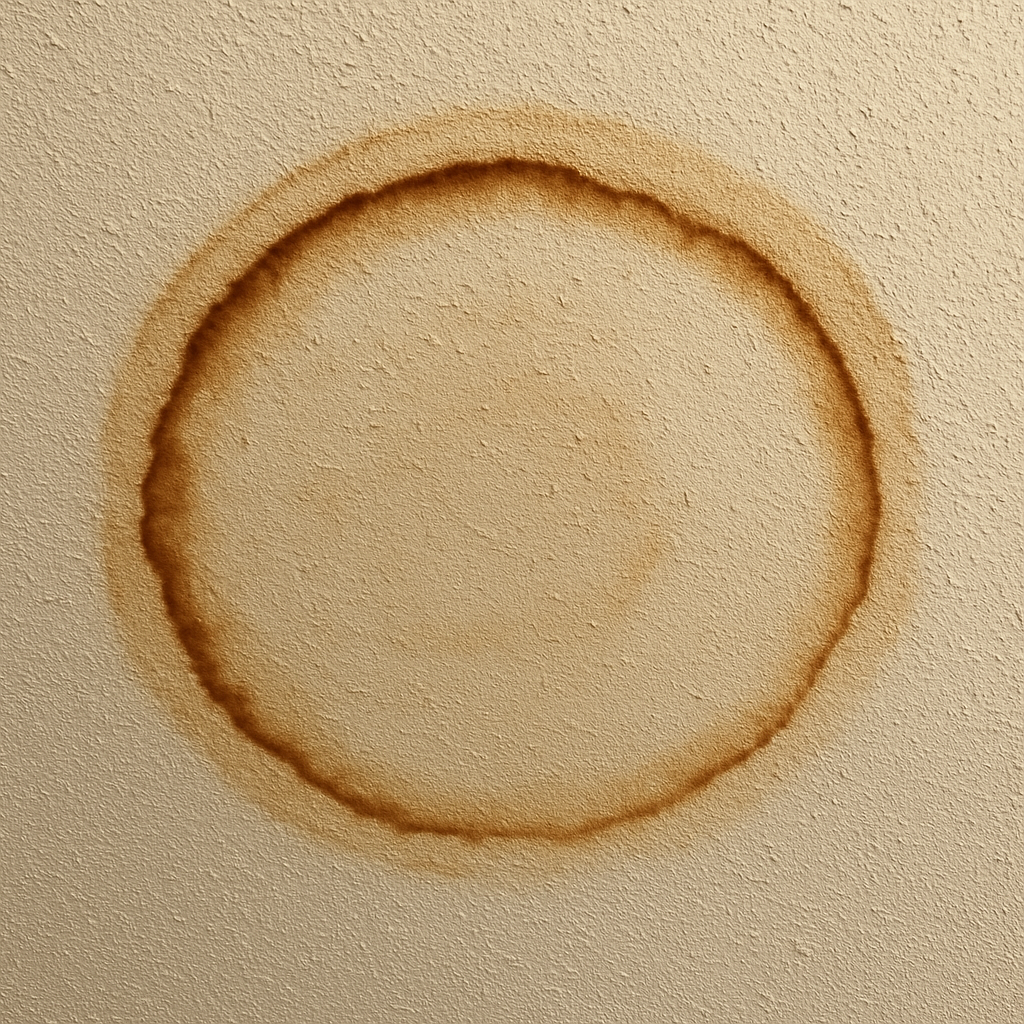
You hear a rhythmic dripping in the hallway, and suddenly you are staring at an expanding brown water stain above your carpet. Discovering a flat roof leaking through ceiling drywall immediately triggers a unique kind of homeowner panic. Your first instinct might be to grab a bucket and call the most expensive contractor in town, but taking a deep breath is actually your best first move.
Contrary to what the name suggests, a perfectly level overhead structure is a recipe for disaster. According to modern construction standards, every successful residential design is actually a “low-slope” roof. This slight, nearly invisible pitch is carefully engineered to keep rainwater moving smoothly toward the edges. As soon as that delicate gravity-based drainage system fails, a leaking flat roof becomes a stressful reality rather than just a distant possibility.
Think of the space above your head not as a traditional slanted structure, but rather as a massive, shallow outdoor bathtub. This basin relies entirely on a continuous waterproof liner and clear drains to keep your living room dry. If a single inch of that “bathtub” seal pulls apart or standing water accumulates, gravity takes over, and suddenly your roof is leaking.
Before you risk climbing a ladder in a panic, we need to secure your home from the inside out. Managing active drips safely requires a simple emergency triage. After neutralising the immediate indoor danger, addressing the underlying causes ensures a permanent structural solution.
Is Your Ceiling Crying?
Spotting a brown circle above is terrifying, but before panicking about aleaking roof, check the stain first. Because water travels through gravity, it pools at the lowest points, creating classicwater spots on ceiling symptoms. A dark outer edge with a lighter center—the “Coffee Ring” test—means you are looking at an older, dried leak. However, a uniformly dark, damp stain means aflat roof leaking through ceiling drywall is an active emergency.
Latex ceiling paint sometimes acts like a rubber water balloon, trapping moisture to form a sagging ceiling bubble. Leaving this heavy blister alone is incredibly dangerous, as the accumulating weight will eventually tear down large, expensive chunks of your drywall.
Taking immediate control prevents catastrophic interior damage. Safely manage a ceiling blister using these straightforward steps:
- Place a large bucket directly beneath the sag.
- Put down thick towels to catch any erratic splashing.
- Poke a single hole in the bubble’s center using a small pin.
- Let the trapped water drain completely.
With the indoor threat temporarily neutralised, you must discover where that water gathered outdoors.

The Bathtub Effect: Why Ponding Water Is Your Roof’s Greatest Enemy
Despite the name, no healthy flat roof is perfectly flat. They are designed with a slight slope to shed water, acting like a shallow shower pan. When drainage fails, you get standing puddles, introducing the 48-hour rule: if water remains two days after a storm, you have a serious drainage problem. Sagging underlying structures and clogged drains are the common causes of flat roof ponding, creating a constant threat to your home.
That lingering water attacks your home’s framing through massive load-bearing stress. Water is incredibly heavy, weighing over eight pounds per gallon. When a blocked drain turns your roof into a bathtub, that trapped weight pushes down, creating a depression that catches even more moisture. This compounding weight explains why flat roof leaks in heavy rain escalate so quickly from minor drips to structural emergencies.
Beyond the crushing weight, standing puddles team up with the sun to destroy your roof. The water acts like a magnifying glass, intensifying heat and severely accelerating UV degradation on residential flat roofs. As the protective membrane bakes and becomes brittle, it pulls away from the edges. Once that material shrinks, water easily slips inside, exploiting vulnerable seams and flashing.

Zippers and Seals
Finding a flat roof leak rarely involves spotting a hole in the middle of a solid sheet. Water usually exploits the connections. Think of your roof’s membrane like a waterproof jacket; if the zipper fails, you get wet. On roofs, these “zippers” are the seams where materials overlap. As weather forces joints to expand and contract, glue cracks, letting moisture inside.
Edges face similar stress and rely entirely on flashing for protection. Flashing involves the metal strips bridging the gap between flat roofing and vertical walls. When these metal guards rust or peel backward, water pours straight into your home. Fortunately, quickly repairing damaged roof flashing often prevents catastrophic structural rot.
Sometimes the surface itself completely breaks down from sun exposure. If your roof looks deeply cracked and scaly like a reptile’s skin, you have “alligatoring.” This extreme cracking is among the most obvious torch-on felt roofing failure symptoms, proving the protective oils have dried out completely.
You can safely identify these warning signs by checking the top five high-traffic leak areas:
- Flashing: Rusted or peeling metal.
- Seams: Lifting along overlap lines.
- Corners: Gaps where walls intersect.
- Skylights: Cracked rubber seals.
- Drains: Debris blocking the exit.
Once you locate the physical failure, the next hurdle is usually financial, particularly when determining responsibility in leasehold flats.
Who Pays for This?
Staring at a dripping ceiling, panic quickly shifts to a pressing financial question: who pays for roof repairs in a flat? To answer this, check your lease for your “demised premises.” This legal term describes the exact space you own—usually just the paint on your ceiling downward. The roof itself acts as the building’s protective shell, meaning it falls strictly under communal responsibility.
Ultimately, figuring out who is responsible for the roof in a leasehold flat usually points to the freeholder. They must organise repairs, but rarely pay from their own pockets. Instead, costs are divided among all residents through a service charge allocation. This shared system ensures top-floor residents don’t face the bill alone just because they caught the water first.
To protect yourself financially, you must immediately give the freeholder “reasonable notice” of the leak in writing. They cannot be held legally liable for problems they do not know exist. Once notified, they can dispatch professionals to check beneath the surface for substrate rot and invisible damage.
Identifying Substrate Rot and Invisible Damage
Once the freeholder is notified, you might wonder what happens beneath the rubber surface. Think back to our bathtub analogy: if the liner tears, water soaks into the roofsubstrate—the wooden decking acting as your roof’s physical foundation. Grasping the structural implications of long-term water ingress is vital because rotting wood ultimately compromises the building’s safety.
Before the wood fully decays, moisture usually attacks the middle layer, resulting in saturated insulation. You don’t need X-ray vision to spot this hidden danger. A persistent musty smell in upper rooms or a sudden spike in your heating bills are classic indicators that your wet insulation is no longer trapping heat.
Finding signs of flat roof substrate rot doesn’t require cutting the roof apart. If you can safely walk up there, use the “Spongy Step” test: carefully feel for spots that squish underfoot like a decaying log. Knowing how to identify water damage under a roofing membrane helps you communicate with contractors, but if water is actively pouring inside, emergency DIY patching is required to stop the ingress.
Emergency First Aid: DIY Patching While the Rain is Still Falling
When water is actively dripping inside, you cannot wait for the storm to pass. Since you already pinpointed the exterior source, your immediate goal shifts to emergency waterproofing measures for storm damage. Think of this step as applying a waterproof medical bandage—it won’t cure the underlying disease, but it stops the bleeding until a professional arrives.
For under £50 at any local DIY store, you can assemble a powerful defence kit. Here is your essential emergency roof kit shopping list:
- Bitumen tape: A thick, tar-based waterproof sticker designed to grip wet surfaces.
- Liquid rubber sealant: A cold-applied liquid membrane that paints on thick to seal complex shapes.
- A stiff brush: For clearing loose debris from the puncture.
- A plastic trowel: To press tape or spread sealant completely flat.
Executing these DIY flat roof repair kit instructions requires acting quickly but carefully. For a straight slice in the roof, firmly press the bitumen tape over the tear, using the trowel to push out trapped water. For jagged holes or uneven seams, liquid-applied waterproofing systems are perfect; simply brush the thick sealant over the area like you are icing a cake. Both methods seal out rain instantly, effectively patching flat roof punctures and tears on the spot.
Remember, these quick fixes are strictly temporary lifesavers. The extreme temperature changes your roof faces will eventually break down emergency adhesives, meaning professional intervention is necessary. When the weather clears and that temporary bandage comes off, a permanent material decision awaits.
EPDM vs. Felt: Choosing the Right Shield for Your Next Roof
After your emergency patch holds, a permanent choice awaits. Older roofs often use layered felt sealed with tar. If you have this setup, watch for torch-on felt roofing failure symptoms like deep, visible cracking. This damage is caused by “thermal expansion”—your roof naturally swelling in the summer heat and shrinking in the winter cold, which eventually tears those rigid, older seams apart.
Modern alternatives solve this rigidness using rubber. EPDM (Ethylene Propylene Diene Monomer) acts like a heavy-duty, flexible pool liner that stretches instead of snapping when the temperature changes. When evaluating EPDM vs felt flat roof longevity, rubber clearly wins. A traditional felt roof survives roughly 15 years, whereas EPDM provides a reliable 30-year shield, delivering superior long-term value despite slightly higher upfront material costs.
Next, you must evaluate the cost-benefit of roof overlay vs full replacement—meaning whether to install a new membrane directly over the old layers or strip everything down to the bare wood. Compare your two main material options carefully before proceeding:
- Lifespan: EPDM (30+ years) outlasts traditional Felt (10-15 years).
- Cost: Felt is cheaper initially, while EPDM yields better long-term ROI.
- Installation: EPDM uses safe, cold adhesives; Felt requires dangerous open-flame torches.
- Failure Points: EPDM vulnerabilities lie in peeling seams; Felt simply cracks from age.
Your final selection ultimately depends on your immediate budget and future housing plans. Regardless of the waterproof membrane you install, preserving it takes minimal effort once it is properly secured. You can easily protect your new investment by establishing a simple, five-minute maintenance routine.
The 5-Minute Maintenance Habit: Preventing the Next Leak
Remember the bathtub analogy: your flat roof is essentially a shallow outdoor bathtub. If the plughole clogs, the water has nowhere to go. This is whyclearing blocked internal roof drains—the pipes routed directly down through the roof rather than over the outside edges—is your most crucial defence. Neglecting this chore is the leading cause offlat roof leaks in heavy rain, as trapped water quickly overloads the structure’s weight limits.
You can prevent 80% of these emergencies with a five-minute check twice a year. Commit to this quick Spring and Autumn schedule:
- Clear Debris: Sweep away leaves and dirt from all drain covers.
- Check Seams: Inspect the membrane edges for obvious peeling or bubbling.
- Test Drainage: Verify water flows freely down the pipes.
To confirm your drainage speed, conduct the “Bucket Test.” Simply pour a bucket of water directly next to the drain; it should disappear within seconds, leaving no puddles behind. If water stalls, you risk a severeflat roof leak during the next storm. Mastering this habit buys you time to implement a long-term action plan.
From Puddle to Protection: Your Long-Term Action Plan
Hearing the drip of a leaking flat roof no longer has to trigger panic. You now understand how your home’s shallow exterior bathtub functions, empowering you to evaluate if your situation requires a temporary patch, a membrane overlay, or a full replacement. Taking decisive action now prevents an annoying flat roof leak from turning into the severe structural implications of long-term water ingress.
When hiring a professional for a permanent solution, use a brief contractor script to ensure they are actually fixing the root problem rather than selling a temporary bandage. First, ask the roofer if they will be checking the underlying substrate for trapped moisture. Next, inquire exactly how they plan to improve drainage in areas prone to standing water. Finally, ask them to explain how their proposed repair materials will handle the roof’s natural thermal expansion without cracking.
Asking those specific questions proves you understand the mechanics of your house and protects you from quick, ineffective fixes. True peace of mind comes from knowing exactly what is happening above your ceiling. You now have the essential vocabulary to protect your home’s structure and the confidence to sleep soundly through the next heavy rainstorm.